| Working with Asterisk, X-Lite and IMSDroid using standard SIP protocol |
| | |
| 1 Install and setup Asterisk |
| 1.1 Install linux
|
Install VirtualBox.
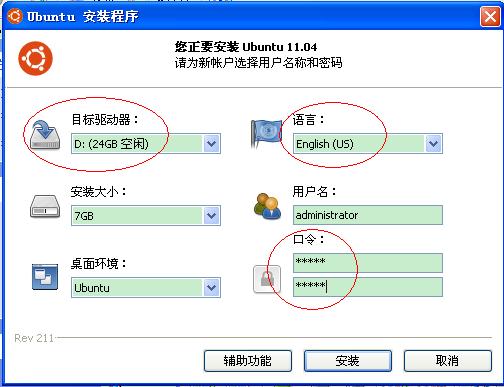
Install ubuntu. The install process is pretty simple. All you have to set is the password of login account(default:adminnstrator). The others can be left as default.
|
| 1.2 Install asterisk |
After Linux booting, login with account and password which set during installation, switch to commond line interface and input the following command to start the asterisk system installation process:
sudo apt-get install asterisk
During installtion, you may need to set the ITU-T Telehone code. Please input "86" for user in China mainland.
|
| 1.3 Cinfigure asterisk |
All the configuration files are located at directory: /etc/asterisk. Proper backup is suggested befor any modification.
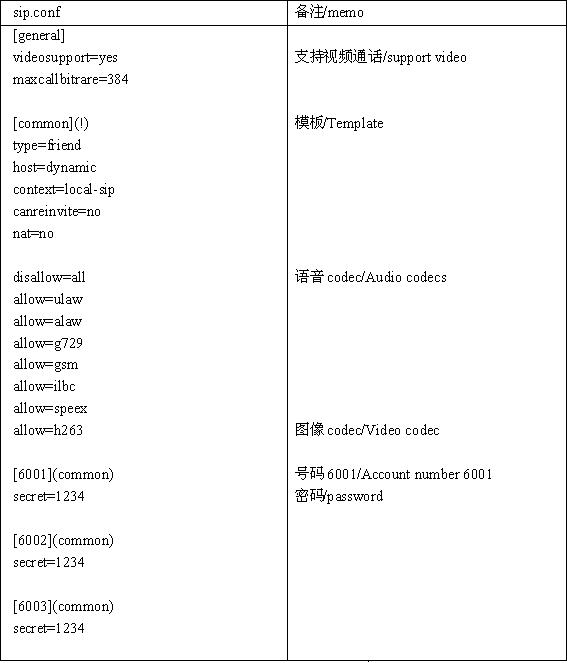
Step 1: Configure sip. The sip configuration information is in the file of sip.conf. You can modify based on the original sip.conf, or you can creat your own sip.conf. Below is a very simple example of sip.conf, which set up 3 account numbers(6001-6003), supporting both audio and video communication.
Step 2: Configure dialplan. Add the following contents in the extensions.conf:

Step 3: Reload sip and dialplan.
Run the following command to switch to the asterisk command line interface(CLI>):
sudo asterisk –r
Reload sip and dialplan at astersik CLI:
CLI> sip reload
CLI> dialplan reload
Notice: Always to reload the corresponding system after modifing their configuration.
Asterisk is now ready. You can configure sip terminals properly for audio or video communication now.
|
| | |
| 2 Install and setup IMSDroid |
| 2.1 Overview |
IMSDroid is the first fully featured open source 3GPP IMS Client for Android devices (1.5 and later). The main purpose of the project is to exhibit doubango's features and to offer an IMS client to the open source community. doubango is an experimental, open source, 3GPP IMS/LTE framework for both embedded (Android, Windows Mobile, Symbian, iPhone, iPad, ...) and desktop systems (Windows XP/Vista/7, MAC OS X, Linux, ...) and is written in ANSI-C to ease portability. The framework has been carefully designed to efficiently work on embedded systems with limited memory and low computing power. For more information, please visit "IMSDroid". |
| 2.2 Installation |
Download installation packet "here", and install the sofrware to your Android device. After installation, you can find a "IMSDroid" icon simillar to at application interface. at application interface.
Notice: You can try different versions if you have any problem.
|
| 2.2 Configuration |
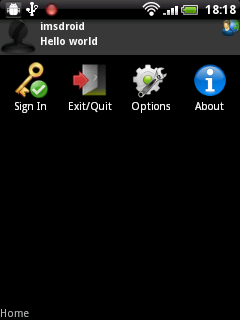
Click icon"IMSDroid" to enter IMSDroid home page as follows:
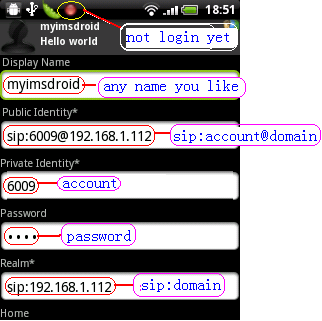
Click icon"Options", then icon "Identity" at home page, you can find the identity configuration page as follows. The contents in the black color are actual settings, while the contents in blue collor are comments. Please go back to home page after finishing the settings.
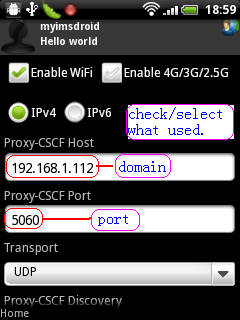
Click icon "Options", then icon"Network" will enter network configuration page as follows. Please set according your network environment. Go back to home page after settings.
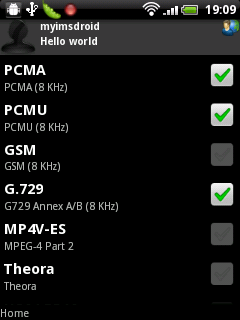
Click icon"Options" then "Codecs", you will enter codec configuration page. choice all the codec options you will use. Go back home page when finished.
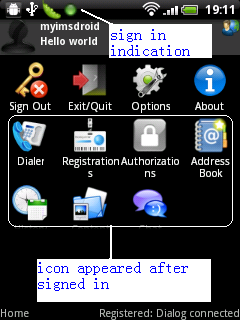
Click icon"Sign in" to login server. You will find seven more icons at home page if login successfully.
|
| 2.3 Start a call |
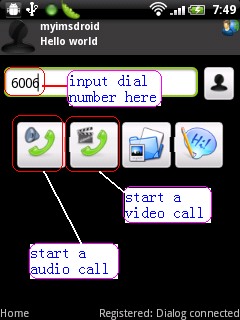
Click icon "Dialer" at home page, you will find the interface as follows. Please input callee number, and click the audio or video icon to start an audio or video call.
|
No comments for this page yet.
|
